Friday, October 23, 2015

Drugstore MakeUp Review : WARDAH


Hi, everyone ! 
It's been 2 months from my last post, i'm sorry.. 
College life drives me busy, but yaa.. no excuse i know
Anyway !! 
This post is going to talk about drugstore makeup, something that i never review about on my blog
I've been following a makeup artist on youtube. She uses foundation from Wardah on her videos
I was curious and i bought it myself
Tried it and WOW... amazing! 


Wardah Luminous Liquid Foundation 
03 Beige

I bought it in Watsons for IDR 39k
It has SPF 15 which is good for protecting your face from the sun
It has non sticky and light texture, also covers imperfections really well
So everything that was written on the cover is true 


The only problem that i found for myself is this shade is s little bit dark for me
If you have a light skin tone like me, you can still work with this shade by adding a light concealer on the center of your face, like on your forehead, nose bridge, under your eyes, and your cheek area
Then this shade will help you to contour the side of your face
You know what i'm saying, right? 

But still i prefer to use my bronzer for contouring, so i decided to buy a lighter shade
I went to Watsons on another day but they don't have a lighter shade for that type of foundation
Instead, the shopkeeper gave me the other type


WARDAH Exclusive Liquid Foundation

The price is higher than the previous one but it definitely worth it cause it's like the upgraded version from the one above
It has SPF 30 and it gives you a dewy feel but it doesn't make your face look shinny as if you're using a bb cream


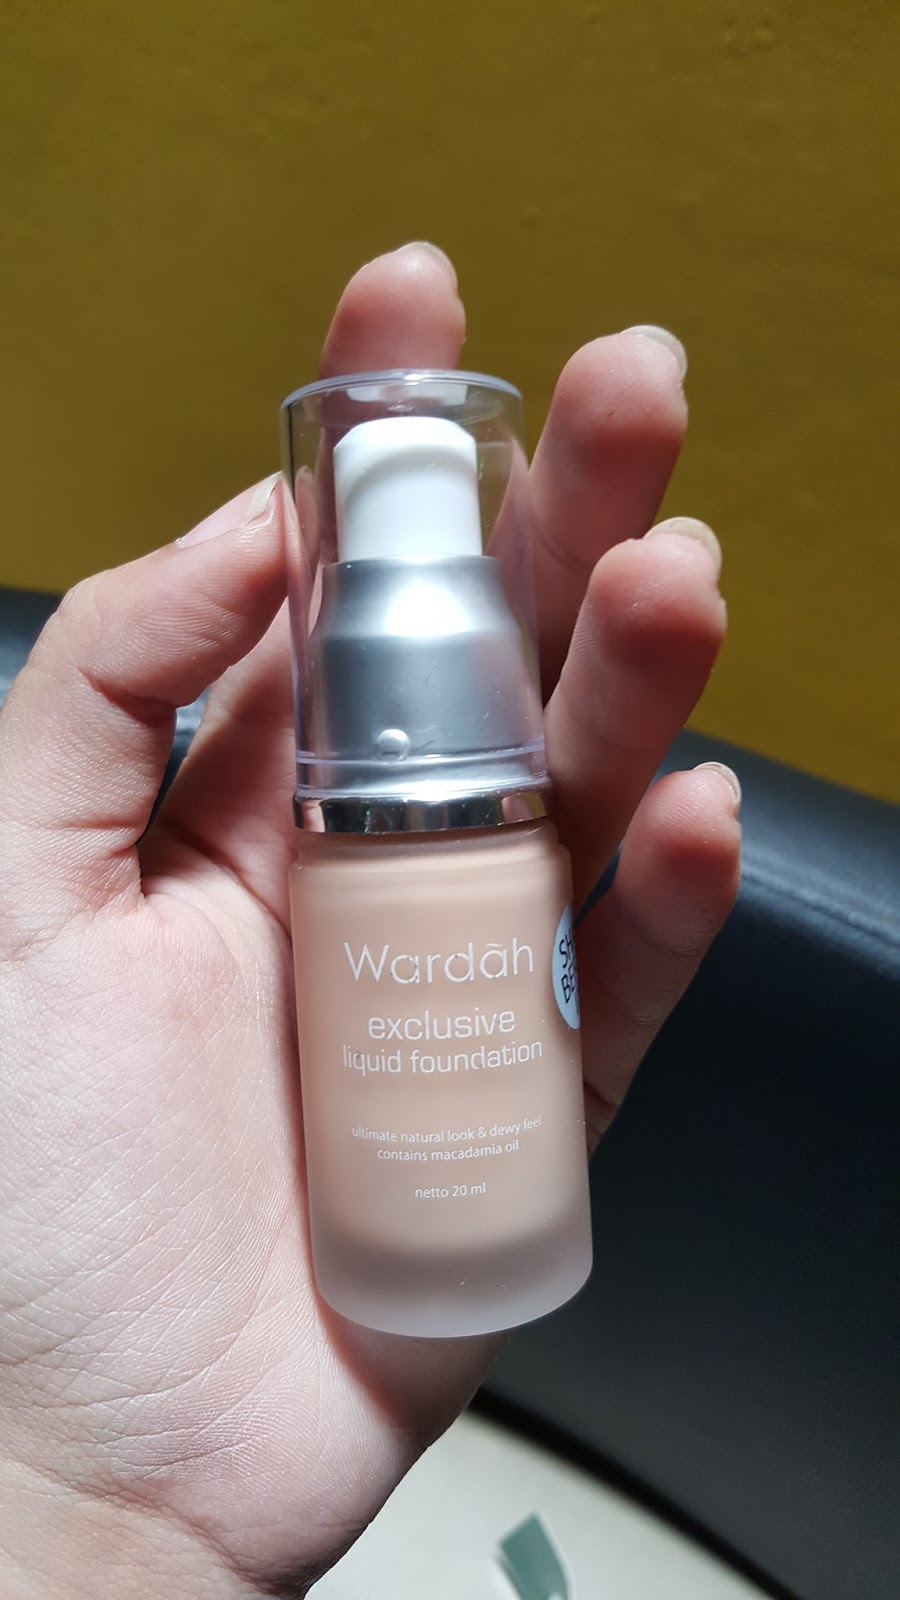
Important plus point : There is a pump !!! 


The shade is number 2 : Sheer Pink


1 : Beige
2 : Sheer Pink

Well, you can tell which one suits me best


☺ Clear and bright 

So, that's it !
I really recommend you to try this drugstore makeup
The price is super affordable with a high quality result
A m a z i n g 
 Love, love, love 

Well, i'll see you soon on my next post! Bye, guys 

Friday, August 28, 2015

Korean Straight Eyebrow Tutorial ft Etude House


Hi, everyone!
Kali ini aku mau bagi-bagi tips gimana aku menggambar alis aku lurus seperti foto di atas :)
Korean inspired 

Aku jarang banget pakai eyeshadow. Biasa untuk makeup mata cuma pakai eyeliner diujung dan maskara aja. Untuk daerah mata aku fokusin ke alis aku. Dan kebanyakan orang biasanya komentar tentang alis aku dari semua produk makeup yang aku aplikasikan ke wajah.
So, i decided to make this post 

Kunci utama untuk bikin alis kayak gini yaitu thick and straight
So here it is :


First, let me introduce you to my natural eyebrows 
Alis aku pada dasarnya tebal. Ini aja udah dicukur sedikit
Bentuknya lebih ke happy eyebrows (agak melengkung) 
So, let's make it straight!


Untuk buat guide line-nya aku pakai produk Etude House yaitu Drawing Eyebrow Gel
Shade : Dark brown
Dia juga udah termasuk spooley di salah satu sisinya jadi kalian ga usah cari-cari mascara brush buat blending 
Bentuknya juga diagonal lancip jadi lebih mudah buat dipakai

My natural eyebrows :D

Gambar guide line-nya selurus mungkin
Jadi pertama kita bingkai alis kita
Buat lurus dibagian atas dan bawah

Setelah membuat bingkainya, langkah selanjutnya adalah mengisi bagian dalam dari bingkai alis kamu
Aku pakai Eyebrow Kit dari Etude House 

Di dalamnya tersedia dua brush, yang pertama ada double ended brush. Ujung yang satu untuk hightlight dan satu lagi untuk mewarnai alis kamu
Selain itu juga ada spooley kecil untuk blending.


Untuk mewarnai alis aku, aku pakai warna yang ditengah. Karena aku ga mau alis aku keliatan ketebelan. Biasa orang pakai warna yang ditengah untuk ujung dalam yang dekat hidung ke tengah, lalu yang coklat gelap dari tengah ke ujung luar.
But i do it differently :p


See the difference? 

 The end result 

 Kamu bisa menggunakan concealer untuk membantu dalam pembentukan bingkai alisnya
Don't forget to blend it with your spooley after you finished filling your brows


So, that's how i do my eyebrows, guys!
It is so easy to achieve this kinda brows
Lalu jangan khawatir kalau alis kiri dan kanan kamu tidak sama
Brows are sisters, not twins
Have a try and good luck!
I'll see you in my next post, bye guys 

Saturday, August 1, 2015

Etude House Vivid Pop Stick

Hi, everyone! 
I want to share a little post about my current favorite lipstick now
And it is from Etude House


It really looks like a crayon, right? ><
As always, Etude House's packaging will never make you bored
It's is so adorable 


I forgot what shade is this  

But here's some pictures of me wearing this product :


I think this is the darkest pink color that they have
I remember i picked the darkest one on the store
But correct me on the comment section if i wrong, kay ? :p


I really like how this lipstick color gives me a bold-flirty look 
It is so easy to apply
The swatch is really similar with a crayon too!
I like to put it on the center of my lips and blend it out with my finger because i don't want it to look too bold on my lips
It stays pretty well too! 

One thing that i don't like about this product is it is quite drying
But don't worry, lip balm saves the day 


That is all for this post
I just want to share my current favorite lipstick with you guys 
Go try it out, you won't be disappointed ^.<

...
As you can see on the last picture....
I'm going to share eye make up tutorial soon!
Stay tuned and stay awesome, guys!
See you on my next post! Bye 

XOXO 


Let's be friends on instagram 
IG : angelicachelseaaa

Tuesday, July 14, 2015

GLAMGLOW Supermud Clearing Treatment ✿ Review


Clear skin is everyone's dream, isn't it?
We all know acne is the most disturbing thing we could have on our faces
I have acne on my face, but luckily it's not much
I have most of the acne around the sides of my forehead and my jaw, my cheek is pretty clear from it.
I know how disturbing acne is, girls.. I feel you  
So, i'll share to you 'my angel' for this problem ! ◕^^◕

✿ Glamglow Supermud Clearing Treatment ✿


Well, hello! ◕ ‿-

Stars everywhere !
Love how clean and glamour the packaging looks 

Mmm... muddy ◕‿◕

Well, i guess you all have the idea of how to use it, right?
Simply cover your face with it 
You can use a brush or a sponge to apply if you don't want to have some of the product inside your nails, but for me i like to use my clean fingers ^^
And yes, it gets inside my nails... ◡╭╮ 

It has tingly feeling to it, nothing like too extreme
You can feel it starting to dry as soon as you finished cover your face with it. It dries fast so make sure you have a quick hand to work with this product
Oh, and it is so refreshing 
It feels like it has some mint on it, you know what i'm saying, right? :p
Leave it for 15 minutes then rinse off

I really like this product and it works wonderful to help me getting rid my acne
It says use it as often as you could, but i found that if you use it too often like everyday, your face will get more oily. It happened to me ><
So, i'll say 2-3 times a week will do you good
It is quite expensive but it's totally worth the money ◕‿ ◕

Okay, guys... hope you find this helpful for you, if you're considering to buy this product i definitely recommend it
Well, i'll see you on my next post!
Stay awesome, guys!
XOXO  

Thursday, June 25, 2015

3CE Nail Lacquer Review

Hi, everyone!
I'm back with 3CE product 


This summer i'm starting to like green ><
So, to boost it up i ordered this :


YES!
Neon Green ! 

It such a bright-happy color :p
Like it a lot 
By the way, it is so thin and liquidy
Actually i had a hard time using this product
You have to keep layering the product til it covers your nails completely
Here's how it looks like on my nails 

Feels brighter on the inside and out with this color on my nails <3

Matched my nails and my shoes
Even from far you can notice that pop up color, right? :D

So, that's it. I do really love this product! Well, you do have to try harder for applying this product but the color makes everything forgiven ><

I still have 2 more 3CE products to review
So, stay tuned for my next post!
Bye <3

Monday, June 1, 2015

DIY Skin Whitening


Hi, everyone! It's been quite long since my last post. Sorry ><
But, you can expect lots of post starting from now because i'm on my super long holiday now!
So, so happy ◕^^◕

Anyway, as you can see on the picture above, i'm wearing a yellow t-shirt to represent this DIY :)

Turmeric Skin Whitening !
Here are some ingredients that you will need :

1. Sponge
You're going to use this for applying the turmeric. You can also use a brush or anything that you prefer.

2. Milk
Any brand will do :D

3. Plate

4. Turmeric Powder
You can find it at the supermarket 

Now, here's how to make it :

Pour the turmeric powder on the plate

Add some milk and mix them together
Balance the milk and the turmeric powder carefully
Don't make it too thick or too liquidy

Now with the sponge...

Color your skin...

Like this ◕‿ ◕

Wait for 15-20 minutes then rinse off
It is quite hard to clean but don't worry, it will come off :)
Use it as often as possible
I had some part of my skin that got darker before and this really works for me! :D

Well, that's it for today. I hope this post will be helpful for you guys who want to lighten up your skin tone ◕^^◕

Try it and good luck 
See you on my next post! Bye :)